

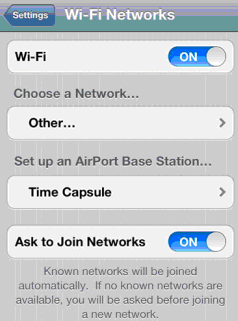
1. Before you start printing, you will need to make sure that Wi-Fi is active on your iOS device; to do this, go to Settings>Wi-Fi. If you are printing to a standalone wireless printer, your iOS device has to be connected to the same wireless network as your printer.
2. Now that you are certain that Wi-Fi is active, make sure that your printer is on.
*Please note that you have to configure your wireless printer using network tool that came with it if you have not done so already (it should be contained on an installation disk). If the printer is not shared through the router using this piece of proprietary software provided by printer manufacturer, no devices (including your iOS device) are going to detect your printer. Both your iOS device and your printer must be connected to the same wireless network.
3. Take your iOS device and open PrinterShare by tapping on its icon.
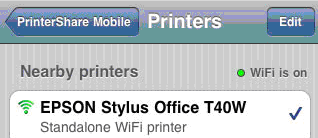
4. You will see the main PrinterShare screen with icons that allow you to access various items that can be printed. Below the grid of icons you will see a button that reads No printer selected; tap it.
5. When your printer is detected under Nearby printers, tap it and you are ready to print.
Once you select an item you would like to print from the main menu of PrinterShare app, you will be taken to Preview screen where you will be able to adjust printing option (paper type, quality of printing, etc.).

