

Before you start printing, you will need to make sure that your Android device is connected to a Wi-Fi network; also make sure that that your printer is connected to the same wireless network as your Android device. The first time you connect to your printer you will have to download a driver for it as well as document rendering libraries (Office or PDF) if you choose to print documents.
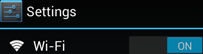
Make sure that Wi-Fi is set to On in Android Settings.
Now that you are certain that Wi-Fi is active, make sure that your printer is on.
Take your android device and open PrinterShare by tapping on its icon. If that is the first time you run PrinterShare, you will see a splash screen with two buttons: Read More (which will provide you with general information on PrinterShare's functionality) and Continue. Tap Continue once you are ready to proceed.
You will see the main PrinterShare screen with icons that allow you to access various items that can be printed. Below the grid of icons you will see an icon of a printer with Printer Not Selected text and Select button displayed beside it.
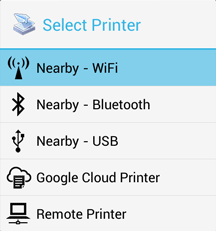
To select your Wi-Fi printer, press Select button.

Now, tap Nearby - Wi-Fi button and wait for the app to detect your printer.
When your printer is detected, tap it. The app will then ask for your permission to download a driver for it which will require at least 4MB on your SD card.
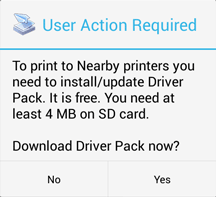
Tap yes and you will be ready to print once the app finishes downloading and installing the driver pack.
